Vinegar is a staple in most kitchens, used for cooking, cleaning, and preserving. Learning to make your own vinegar at home is not only a fun and rewarding DIY project, but it’s also an excellent way to save money and reduce waste. By using leftover fruit and vegetables, you can turn your kitchen scraps into a delicious and versatile household staple. In this blog post, we’ll guide you through the process of making your own vinegar at home, step by step.
What is Vinegar?
Vinegar is a sour liquid made by fermenting alcohol. The word “vinegar” comes from the French “vin aigre,” which means “sour wine.” Most vinegars are made from either grapes, apples, or rice, but you can make vinegar from almost any fruit or vegetable that contains sugar. The sugar is fermented by bacteria and yeast, which produce alcohol, and then acetic acid bacteria convert the alcohol into acetic acid.
What You’ll Need to Make Your Own Vinegar
Making your own vinegar at home requires only a few simple ingredients and tools. Here’s what you’ll need:
- Fruit or vegetables
- Sugar
- Water
- A large glass jar with a lid
- Cheesecloth or a clean cloth
- Rubber bands or string
- A dark, warm place
Step-by-Step Guide to Making Your Own Vinegar
Choose Your Fruit or Vegetables:
The first step in making your own vinegar is to choose the fruit or vegetables you want to use. You can use any fruit or vegetable that contains sugar, such as apples, grapes, berries, peaches, tomatoes, or even leftover peels and cores.
Make a Fruit Mash:
Once you’ve chosen your fruit or vegetables, chop them up into small pieces and place them in a large glass jar. Fill the jar with enough water to cover the fruit, and add sugar to taste. Stir the mixture well to dissolve the sugar, then cover the jar with a cheesecloth or clean cloth and secure it with rubber bands or string.
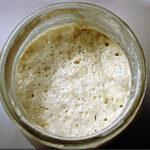
Ferment:
Place the jar in a warm, dark place, such as a cupboard or pantry, and let it ferment for about two weeks. During this time, the fruit and sugar mixture will begin to ferment, and yeast and bacteria will start to grow. You’ll notice that the mixture begins to bubble and a thick, white layer of scum will form on top of the liquid. This is perfectly normal and is a sign that the fermentation process is working.
Strain:
Once the fermentation process is complete, strain the fruit mash through a cheesecloth or clean cloth to remove the solids. Discard the solids and pour the liquid into a clean glass jar.
Age:
Place the jar of liquid in a warm, dark place, such as a cupboard or pantry, and let it age for another two to three weeks. During this time, the acetic acid bacteria will convert the alcohol into vinegar. You’ll know that the vinegar is ready when it has a sharp, sour taste and a strong, acetic acid smell.
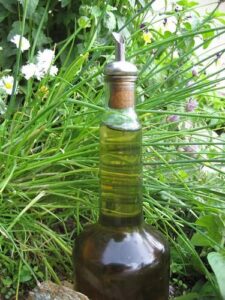
Store:
Once the vinegar is ready, pour it into a clean glass bottle with a tight-fitting lid, and store it in a cool, dark place. Your homemade vinegar will keep for up to one year.
Tips for Making the Best Vinegar
- Use ripe fruit or vegetables for the best flavor
- Use a mixture of different fruits or vegetables for a unique and complex flavor
- Avoid using fruits or vegetables that have gone bad, as they can introduce unwanted bacteria into your vinegar
- Use organic sugar, as it will contain more yeast and bacteria, which will help to jumpstart the fermentation process
- Avoid using metal containers or utensils, as they can react with the acetic acid and affect the taste of your vinegar
- Stir the mixture regularly to ensure that all of the sugar is dissolved and to encourage the growth of yeast and bacteria
- Be patient and allow the vinegar to age for at least 4 weeks to fully develop its flavor and aroma.
Conclusion
Making your own vinegar at home is a simple and rewarding DIY project that will save you money and reduce waste. By using leftover fruit and vegetables, you can turn your kitchen scraps into a delicious and versatile household staple. With a few simple ingredients and tools, and by following our step-by-step guide, you’ll be able to make your own vinegar in no time. Give it a try and enjoy the satisfaction of creating something from scratch!
Keywords: make your own vinegar, DIY vinegar, vinegar recipes, homemade vinegar, how to make vinegar, vinegar making, how to make homemade vinegar, how to make your own vinegar, making vinegar at home, tips to make your own vinegar, make your own vinegar tips, make your own vinegar at home, how to make your own vinegar, steps to make your own vinegar
Check out our Novel Writing Workbooks
Check out Little Tree Food Forest for articles on food forests and homesteading.
Check out FoodieScapes for articles on growing, fermenting and preserving food
Check out StoryScapes.World for articles on writing.
Subscribe to our newsletter to get information delivered to your inbox on edible landscaping, growing food and medicinal plants, growing mushrooms, foraging, fermentation, food preservation, raising small livestock, and more.